Hotspots
Clickable regions on page images
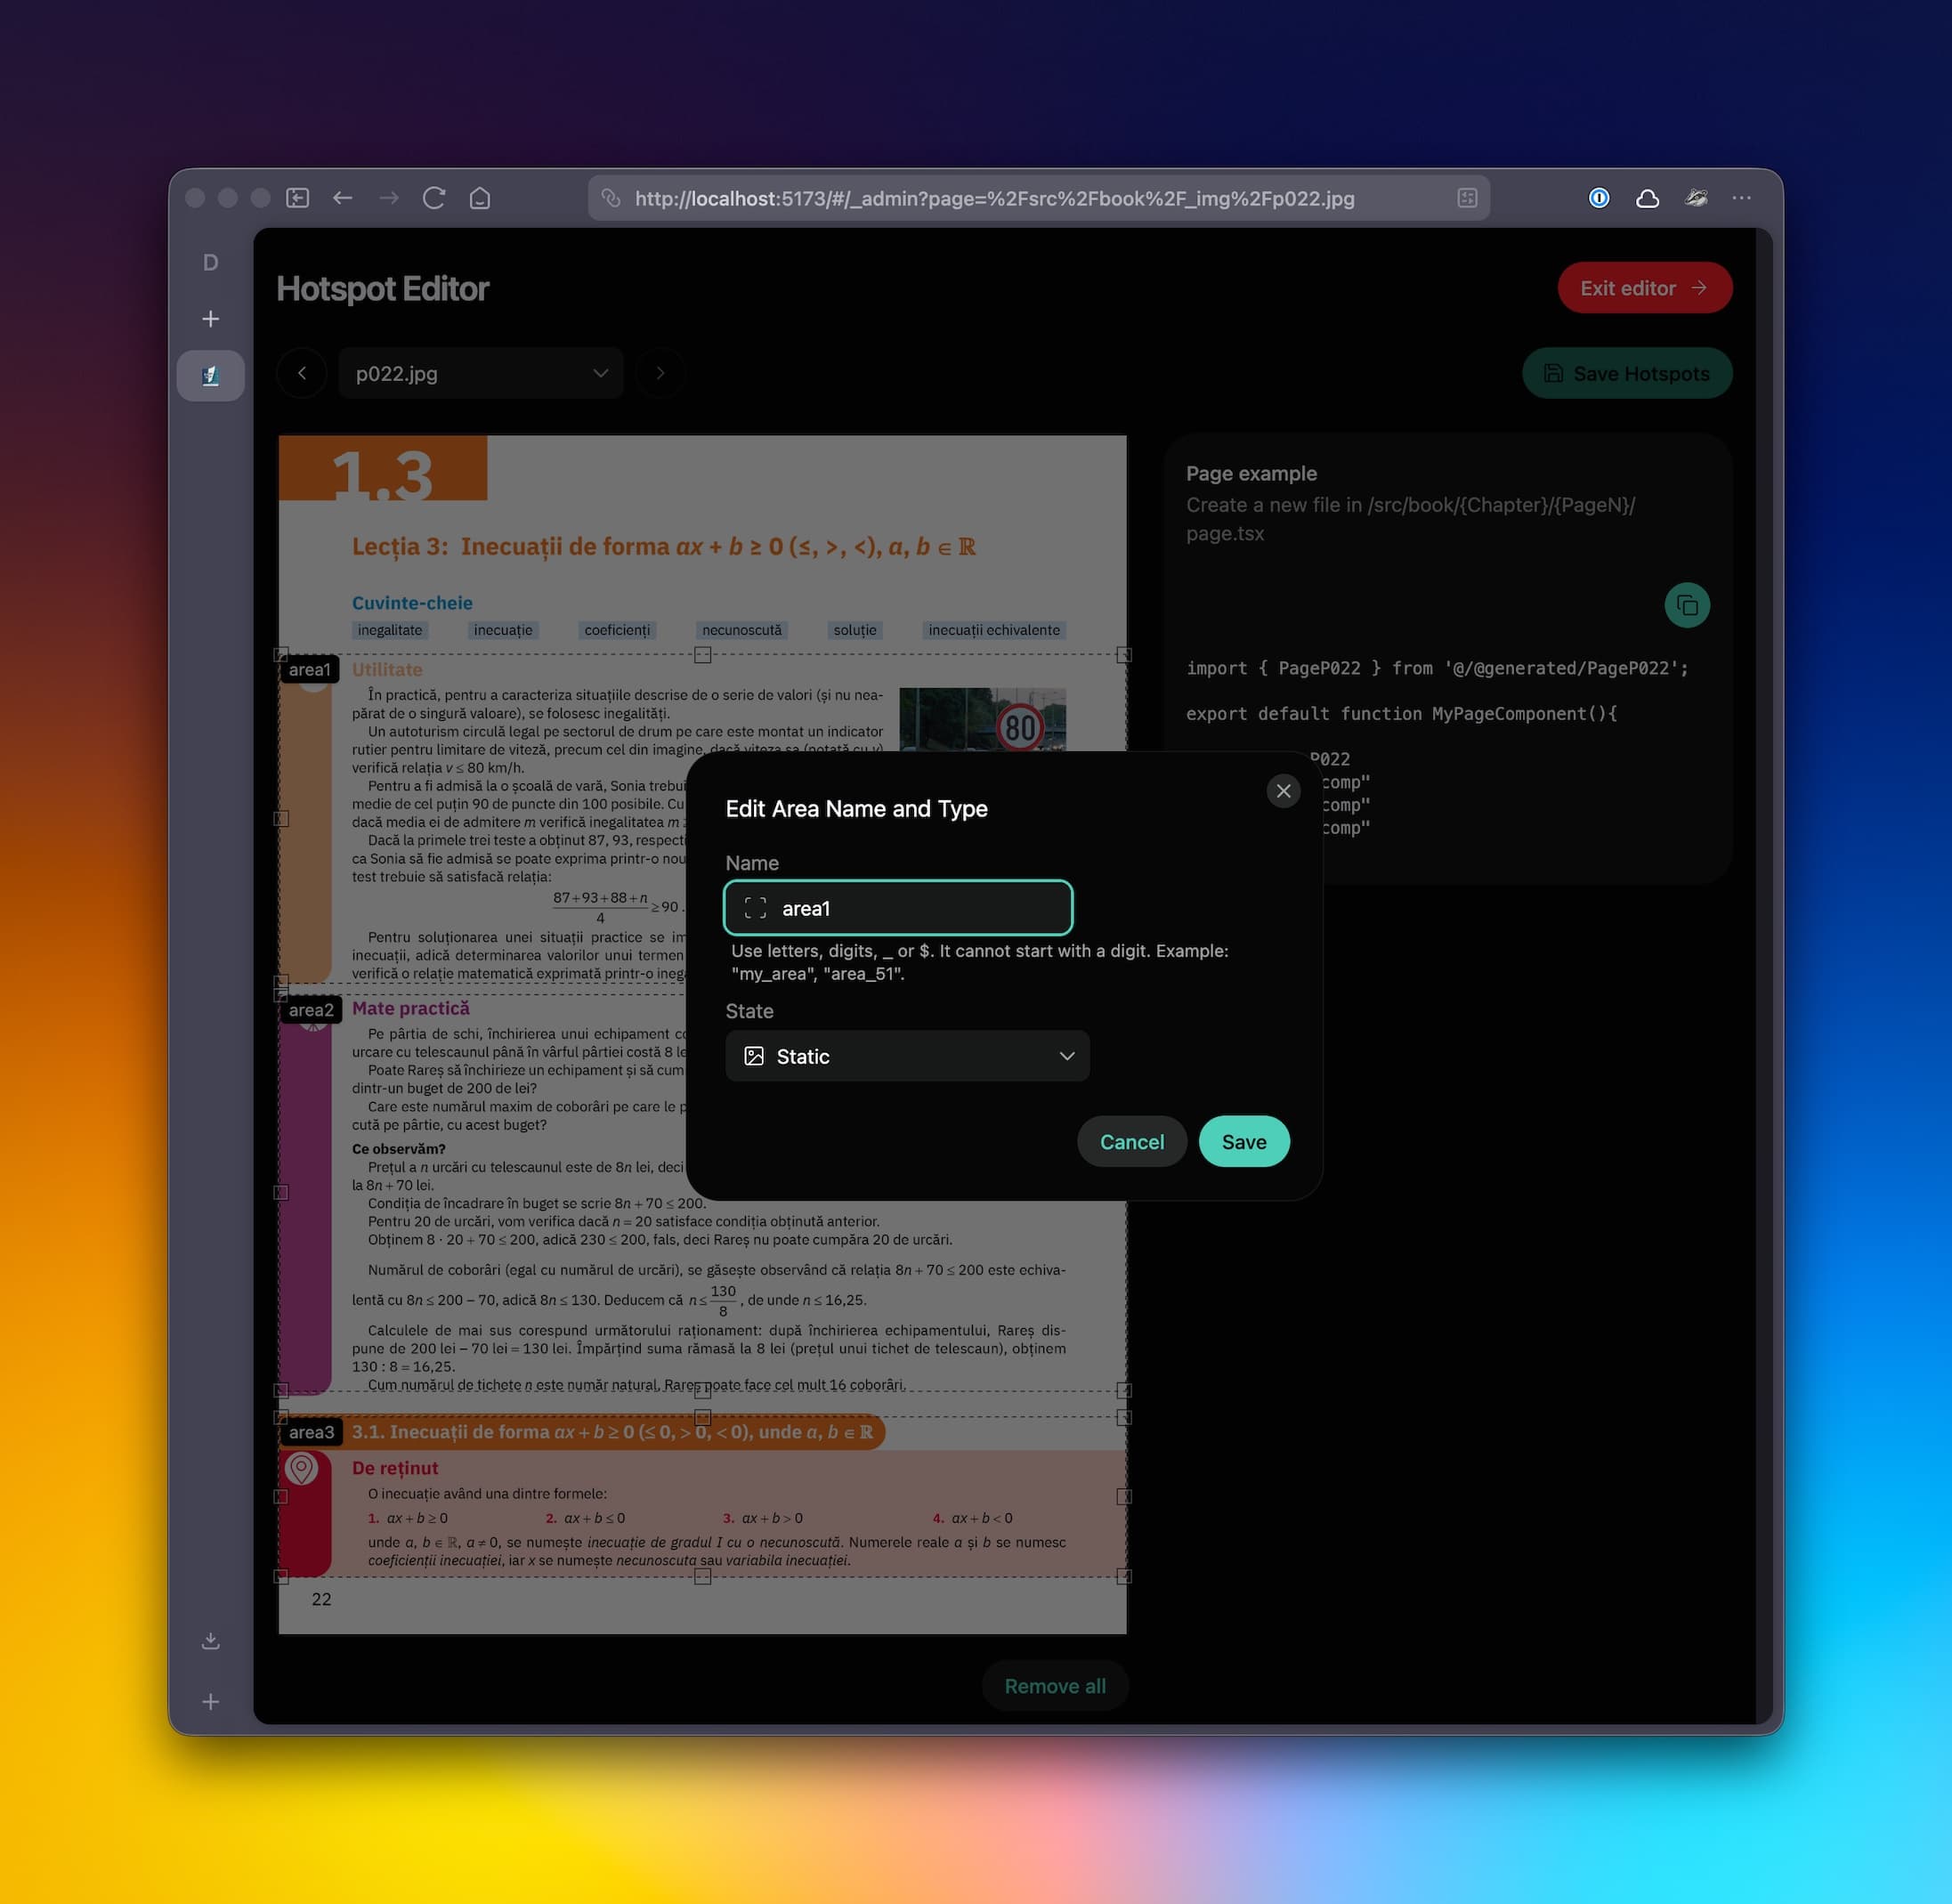
Hotspots are clickable regions on a page image. They let you overlay interactive content (explanations, exercises, etc.) on top of the image. You can add / edit hotspots from the Hotspot Editor.
Adding hotspots
- Add the page image to
src/book/_img/ - Restart the dev server
- Open the Hotspot Editor (
/_admin) - Select your image using the page selector (or use the previous/next buttons)
- Draw rectangles on the image for each interactive area
- Click Save — the generated page component will expose each area as a prop (e.g.
area1,area2)
Naming
Name hotspots clearly; their names become prop names on the generated page component. For example, a hotspot named intro becomes the intro prop: <PageMyImage intro={<IntroContent />} />.
To edit a hotspot's name and type, hover over the area and click the pencil icon in the action menu. The name must be a valid identifier:
- Use only letters, digits,
_, or$ - Cannot start with a digit
- Examples:
my_area,area_51,intro,exercise_1
Area types
Each hotspot has a type that describes its content:
| Type | Use for |
|---|---|
| Static | Text or images — content that doesn't change or respond to interaction |
| Multimedia | Audio or video — embedded media players |
| Interactive | Exercises — quizzes, drag-and-drop, and other interactive components |
Set the type when editing an area's name in the Hotspot Editor.
Icons
Each type has a default overlay icon, shown on the page hotspot and in the help legend:
| Type | Default icon (Lucide) |
|---|---|
| Static | BookOpen |
| Multimedia | PlayCircle |
| Interactive | Zap |
Override any of them in src/book/hotspotIcons.ts with another Lucide icon or a Vite image import. Image imports replace the colored circular marker and are not tinted. Omit a type to keep its default. See Hotspot icons for examples.
Reveal animation
On page load, hotspot overlays play a short reveal so readers can see available areas. Override --hotspot-reveal-duration in src/book/custom.css (default 2.5s). Set it to 0s to skip the animation. See Styling.
Content
Each hotspot receives content from an atom — a React component defined in atoms.tsx in the page folder. Pass atoms as props when using the generated page component.
Workflow
- Create the page via Page Creator in the Hotspot Editor (after drawing hotspots)
- Define atoms in
atoms.tsxfor each hotspot - In
page.tsx, pass atoms to the generated component:<PageMyImage area1={<Area1Atom />} area2={<Area2Atom />} />
To add or change hotspots, edit in the Hotspot Editor and save. The generated component updates; your page.tsx and atoms.tsx stay the same unless you add or remove areas.